Customer Order
This document provides instructions for using the Customer Order feature in the Checkout App. Customer Order allows cashiers to create pre-orders for items that may not be available in the current store, with support for multiple order methods (pickup or delivery).
Overview
Customer Order enables:
- Creating a new order basket separate from the main receipt
- Adding items via Variant Search
- Configuring multiple order methods (pickup in store or home delivery)
- Linking loyalty membership to the order
- Managing customer contact details
- Finalizing orders for processing
Configuration
Customer Order is enabled via CCC configuration using the cha.settings.v1 schema:
{
    "pos": {
        "customerOrder": {
            "enabled": true,
            "searchEnabled": true
        }
    }
}
Configuration options:
- enabled (required) - Enables customer order feature in POS mode
- searchEnabled (optional) - Enables customer order search functionality in the POS
For detailed configuration setup, see Customer Order configuration. For the search-specific behavior and configuration notes, see Customer Order Search.
Creating a New Order
A new customer order is initiated from Variant Search:
-
Open Variant Search
-
Navigate through categories or use the search field to find the desired item
-
Select a model from the search results, then choose a specific variant
-
Two options are available to start the order:
Option A: Start Order Directly
If pickup store selection is not required:
-
Click Start Order button in the bottom left of the variant details screen
-
The order is created with the selected item and you're navigated to the Customer Order view
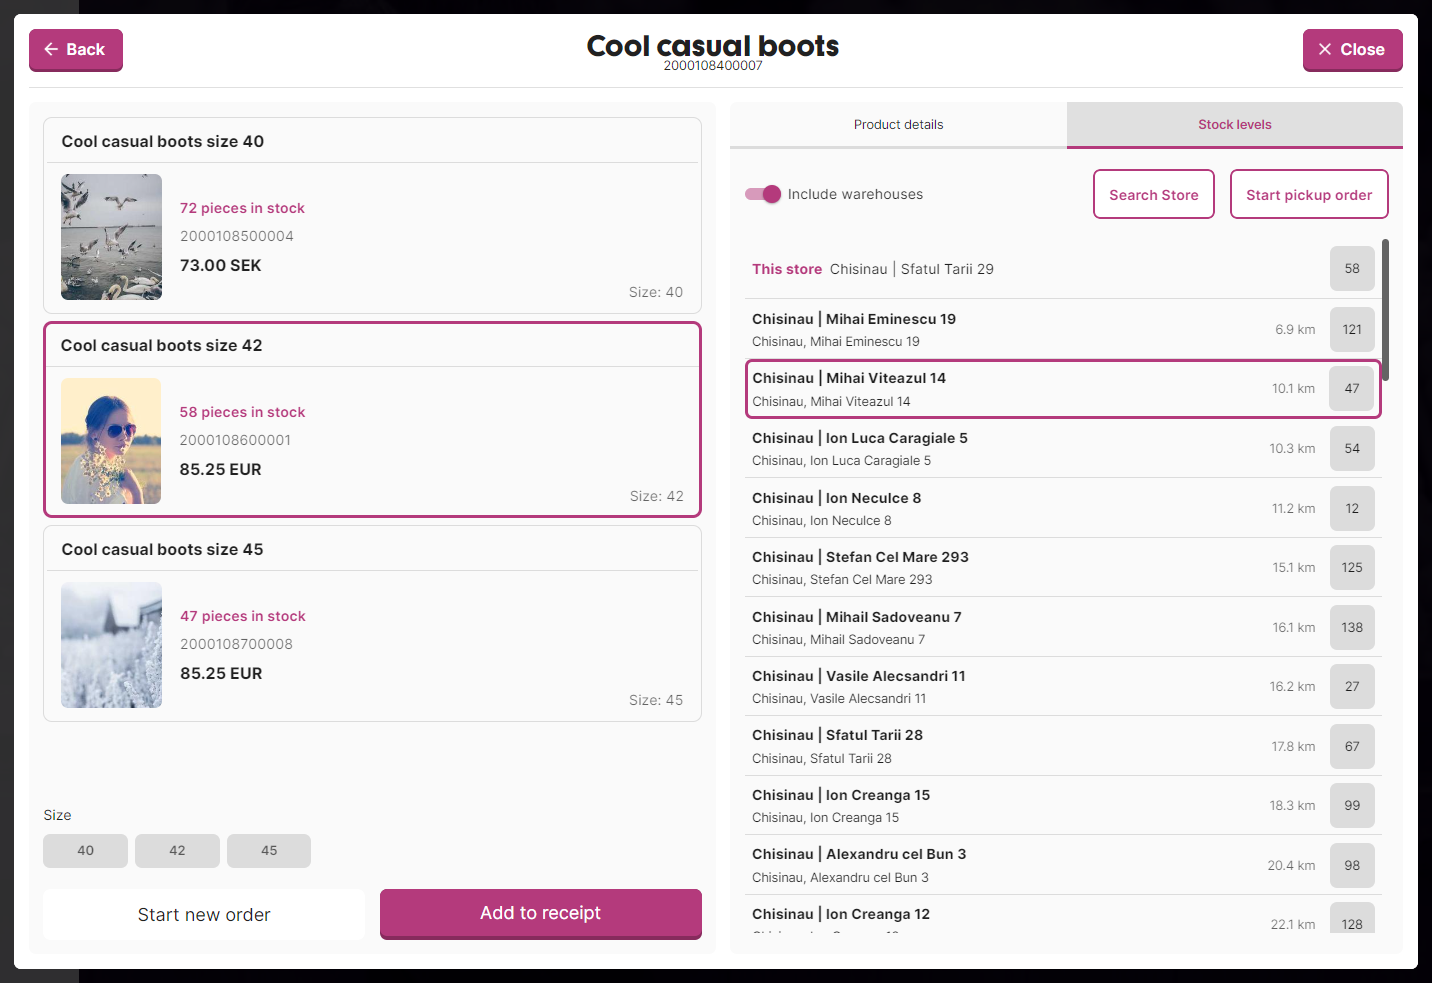
Option B: Start Order with Pickup Store
To pre-select a pickup store for the order:
-
In the variant details, switch to the Stock tab to view nearby stock availability
-
Use the search field or filter by warehouses to find stores with available stock
-
Select a store from the list (it will be highlighted)
-
Click Start Pickup Order button that appears after store selection
-
The order is created with Pickup in Store order method pre-configured for the selected store
Customer Order View
After starting an order, the Customer Order View is displayed with three main sections:
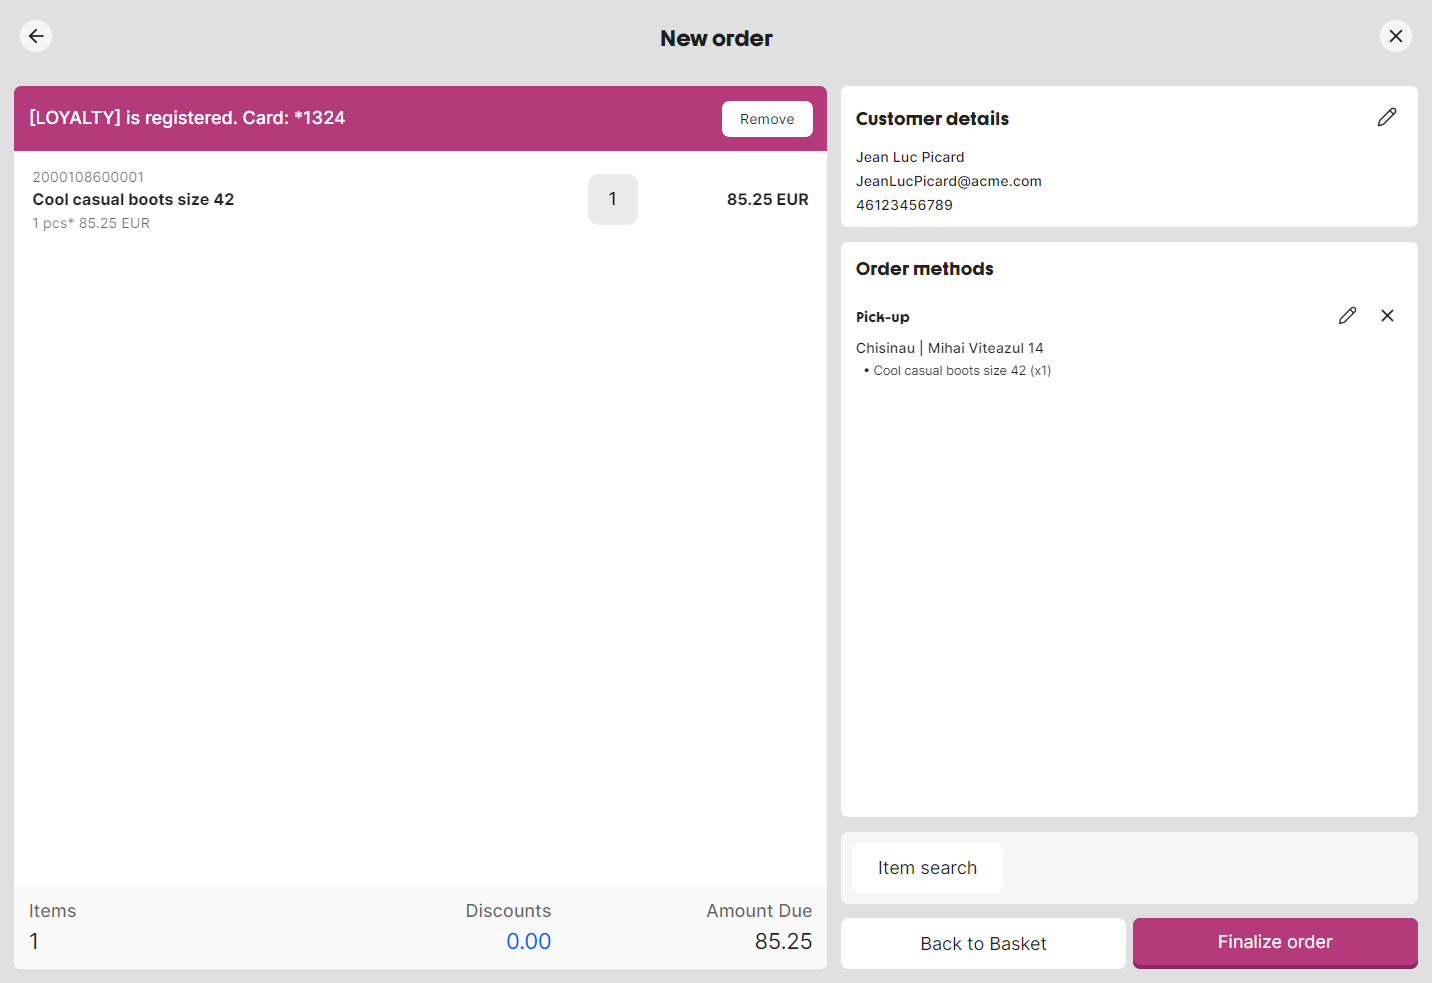
Left Column: Order Basket
Displays all items in the order with:
- Item names and quantities
- Item prices
- Visual indication of which items belong to which order method
- Order totals
Right Column: Customer Details
Shows customer information when entered:
- Customer name
- Email address
- Phone numbers
Click the Edit icon to modify customer details.
Right Column: Order Methods
Displays all configured order methods and unassigned items:
- Unassigned Items - items not yet linked to an order method
- Order method cards - showing method type (Pickup/Delivery) and address
Adding Items to the Order
-
Click the Item Search shortcut in the bottom left corner of the Customer Order view
-
Search and select items as usual
-
When opened from Customer Order context, clicking Add to Receipt will add the item to the order basket instead of the main receipt
-
Return to Customer Order view - the new item appears in the basket
Managing Unassigned Items
Items added to the order that are not linked to any order method appear in the Unassigned Items section:
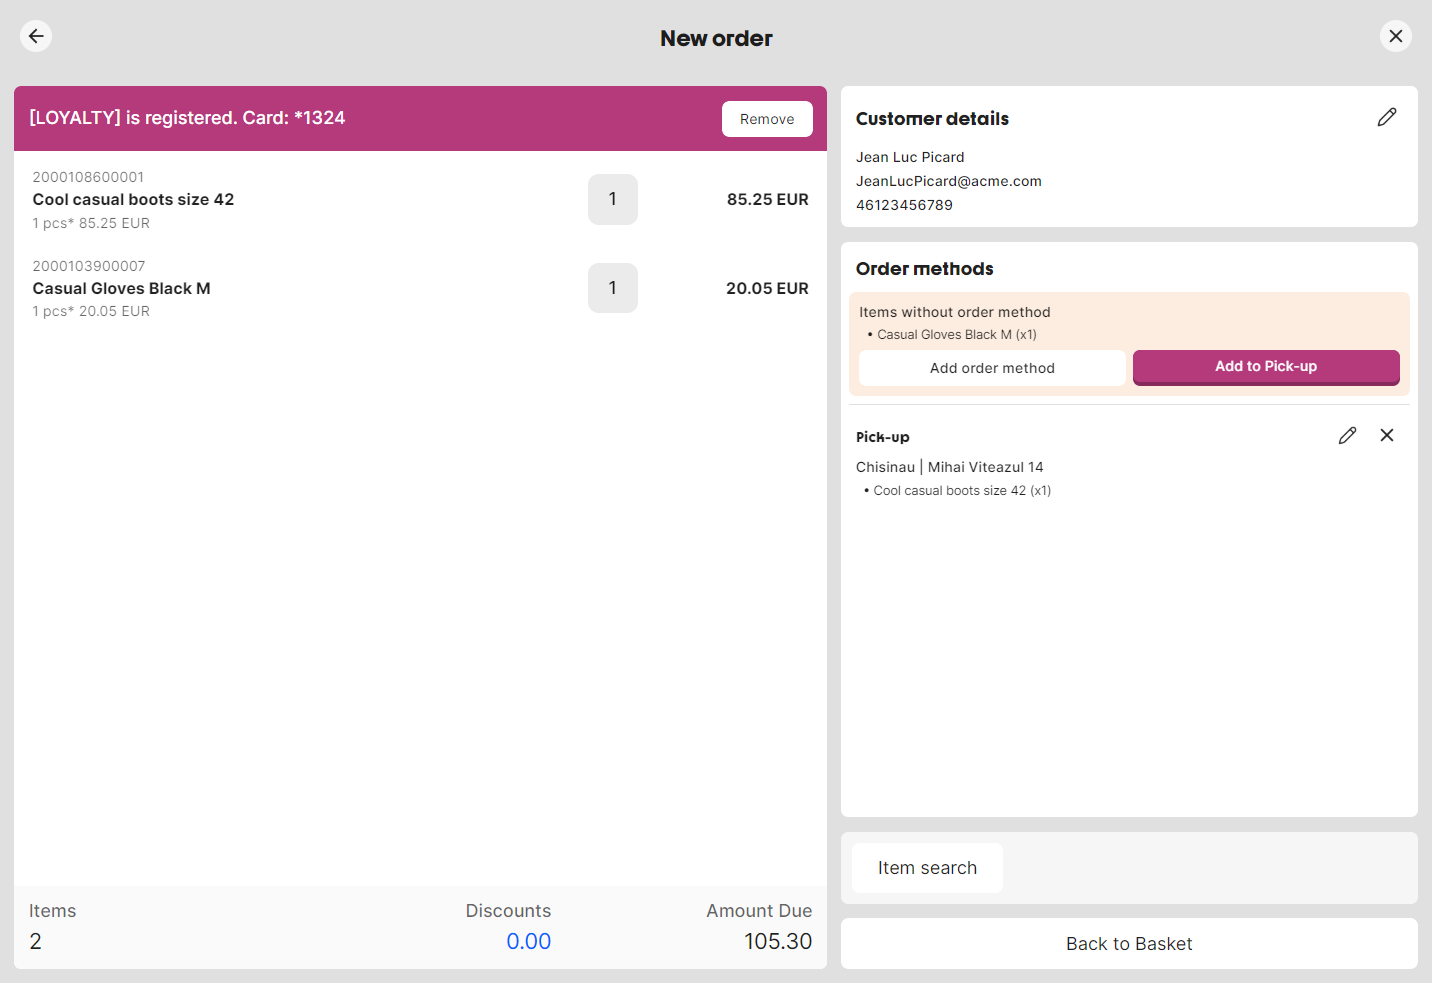
When unassigned items exist, you have two options:
Assign to Existing Order Method
If at least one order method exists:
- Click Assign to [Method] button
- If multiple order methods exist, first select an order method card, then click the assign button
- Items are automatically added to the selected order method
Create New Order Method
- Click Add Order Method button
- Fill in the order method form (see Order Method Forms)
Important: Order cannot be finalized while unassigned items exist. All items must be assigned to order methods.
Order Methods
Creating an Order Method
- Click Add Order Method button in the Order Methods section
- Select items to include in this order method
- Choose order method type:
- Delivery
- Pick-up in Store
- Fill in required details based on type
- Click Confirm
Editing an Order Method
- Click the Edit icon on the order method card
- Modify item selection, method type, or address details
- Click Confirm to save changes
Deleting an Order Method
- Click the X icon on the order method card
- Confirm deletion in the dialog
- Items from deleted order method become unassigned
Note: Removing all items from an order method during editing will trigger the delete confirmation dialog.
Order Method Forms
Home Delivery Form
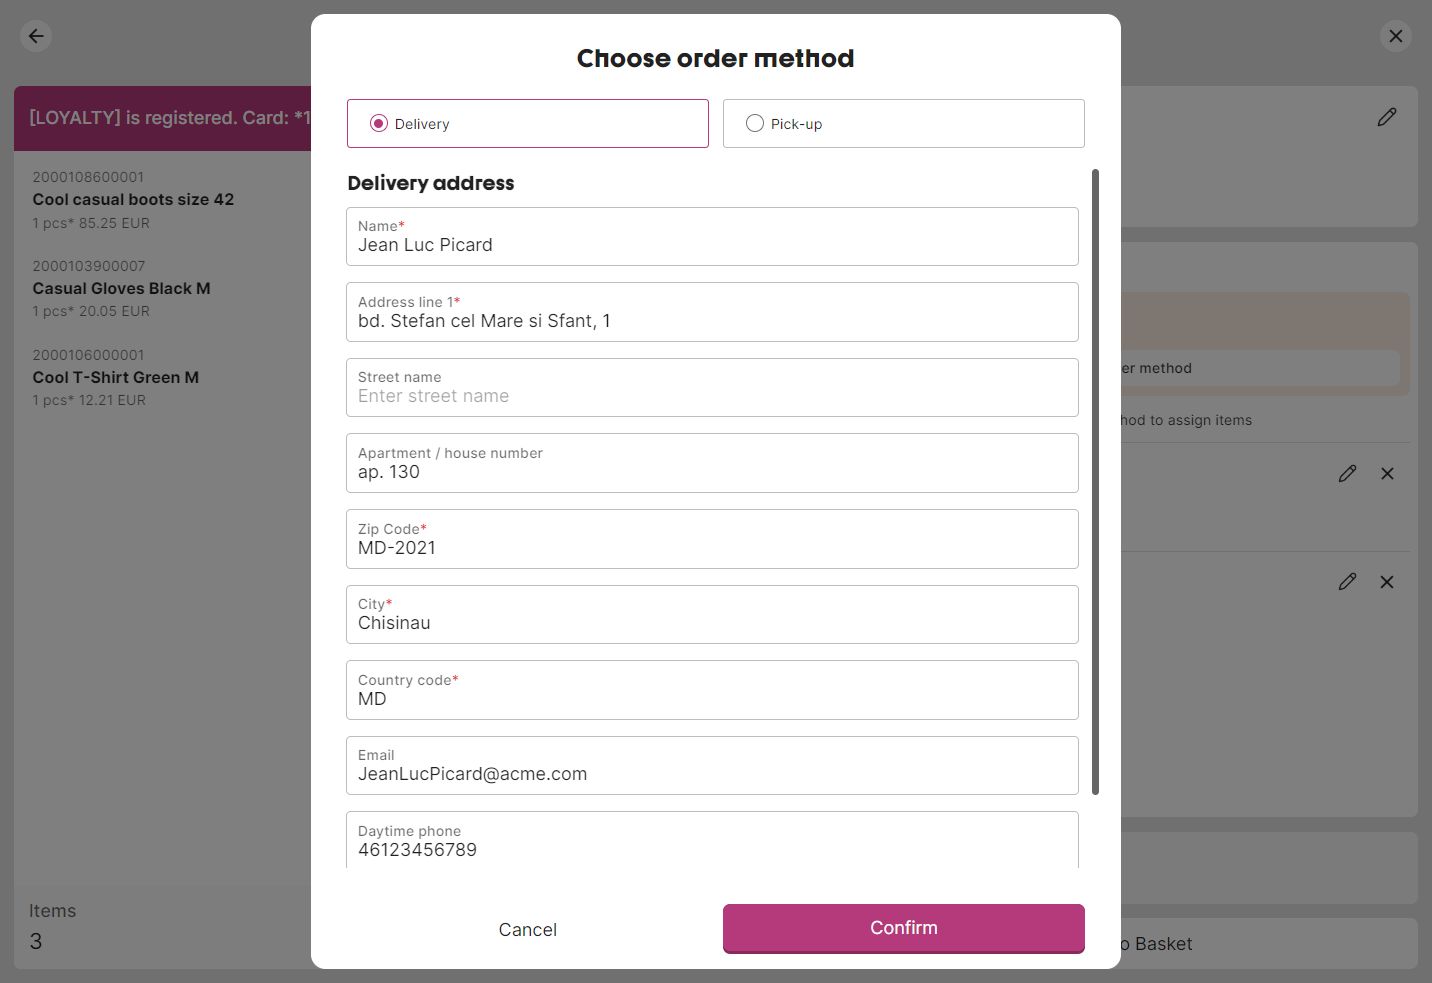
Required fields:
- Delivery address (street, apartment, postal code, city, country)
- Customer name
- Contact phone number
- Email (optional)
Address fields are pre-filled from customer details if available.
Pickup in Store Form
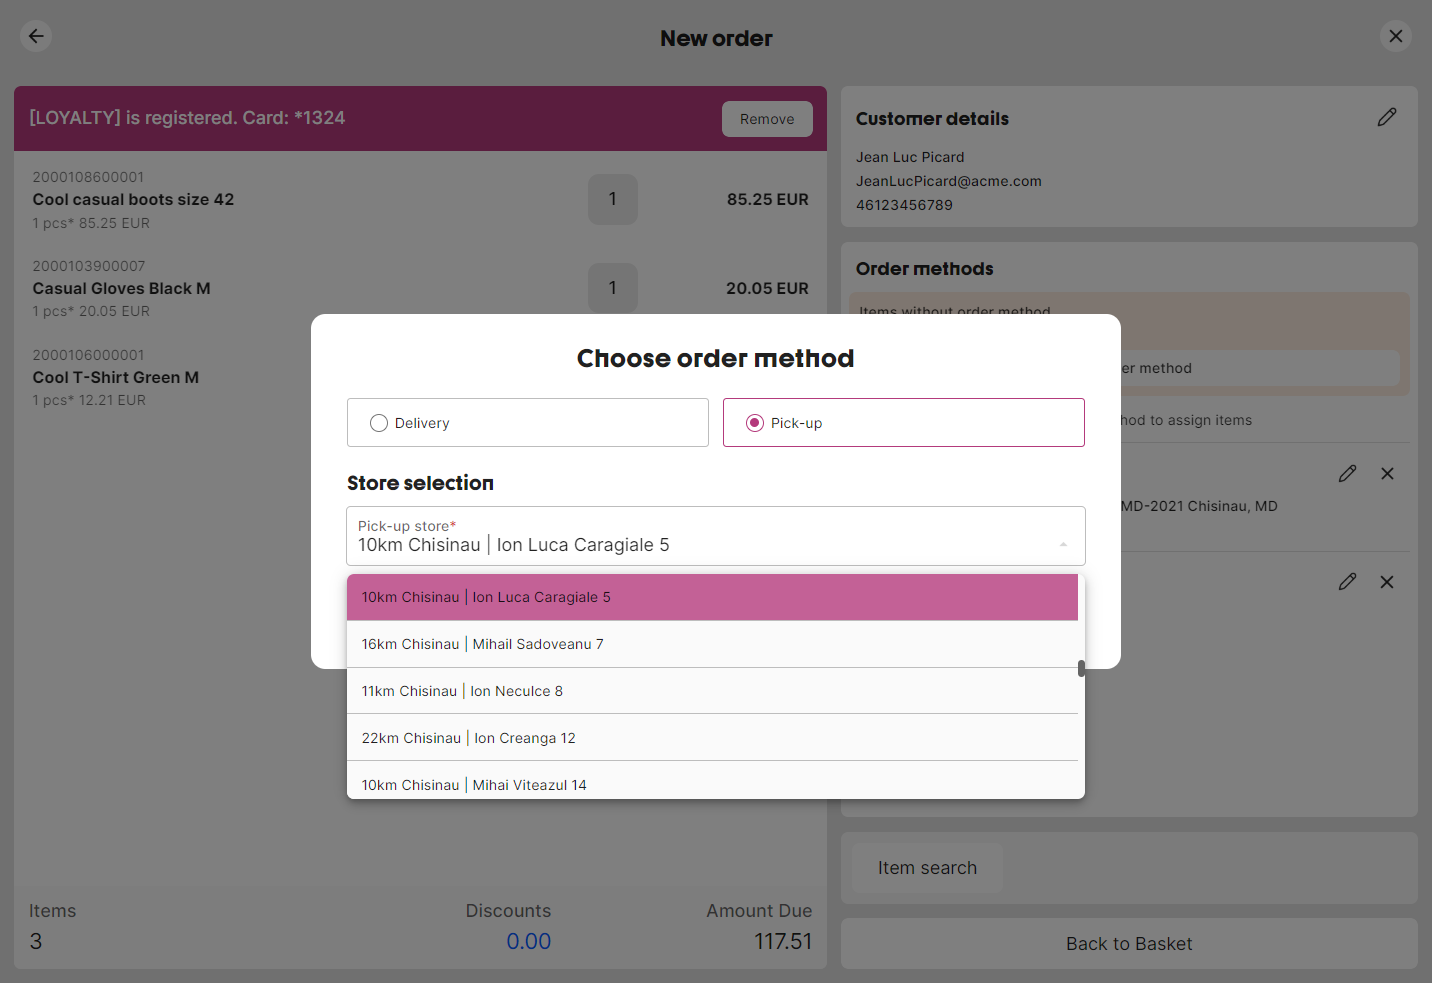
Required fields:
- Pickup store selection (dropdown of available business units)
Customer Details
Adding Customer Details
- Click Add Customer Details button (shown when no customer info exists)
- Fill in the customer details form
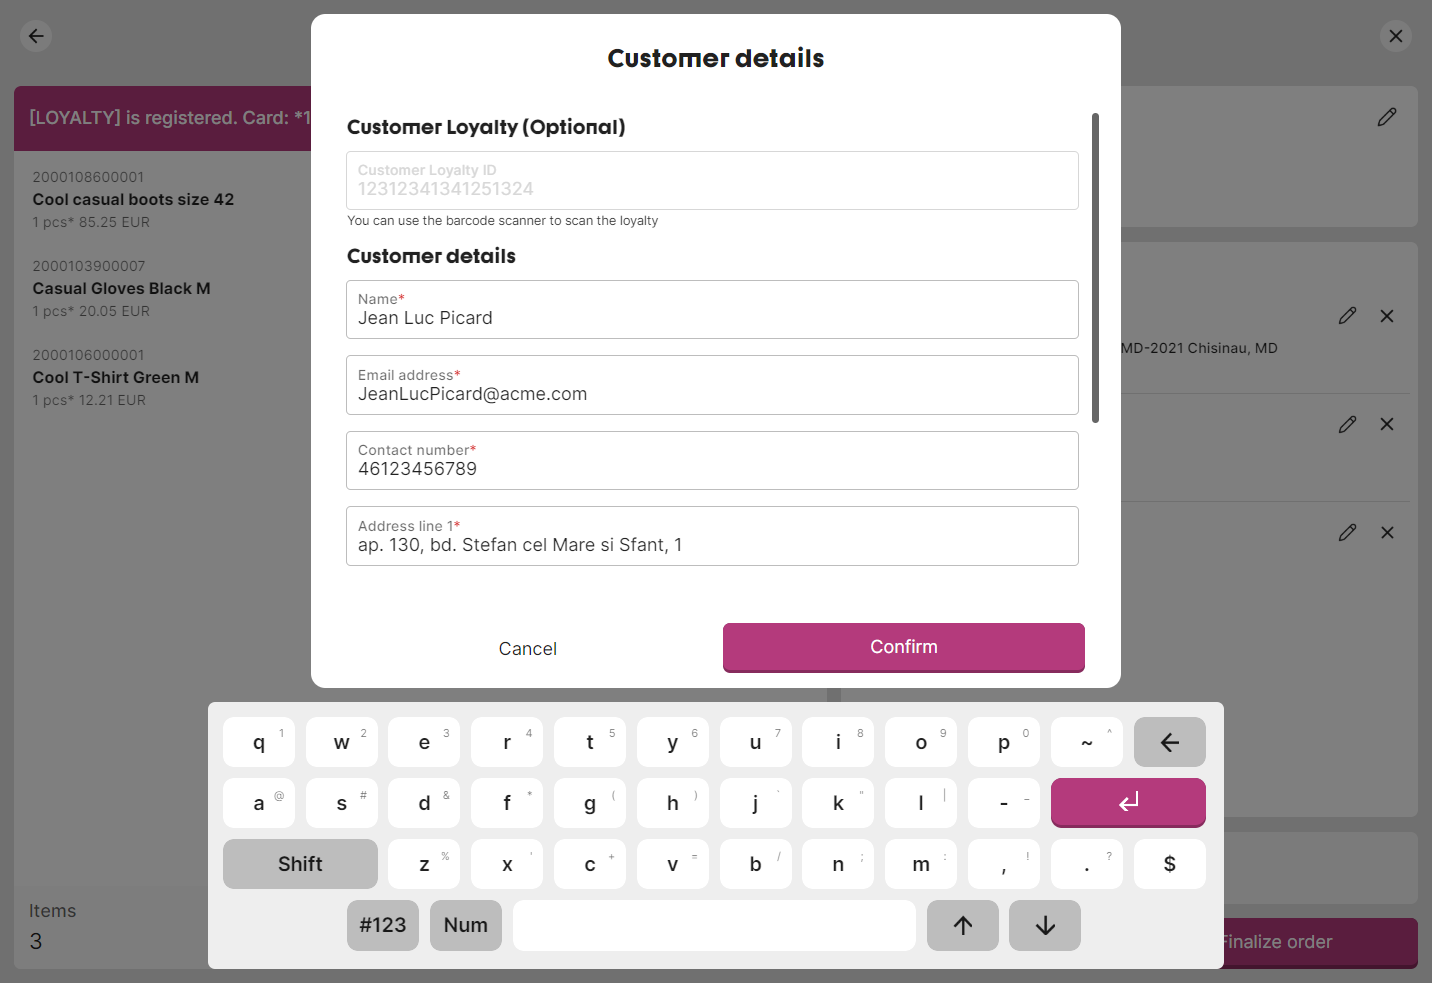
Loyalty Integration
The customer details form includes loyalty registration:
- Enter loyalty card number manually or scan the barcode
- Click Add loyalty to link loyalty membership
- Customer data (name, email, phone) will be automatically populated from loyalty service if available
Loyalty Inheritance
When starting a new customer order:
- If a loyalty card is already linked to the main receipt, it is automatically propagated to the customer order
- Customer details from loyalty are used as defaults for delivery order method forms
Removing Loyalty
If loyalty was added incorrectly:
- Click Remove next to the loyalty card number at the top of the order basket
- Confirm removal in the dialog
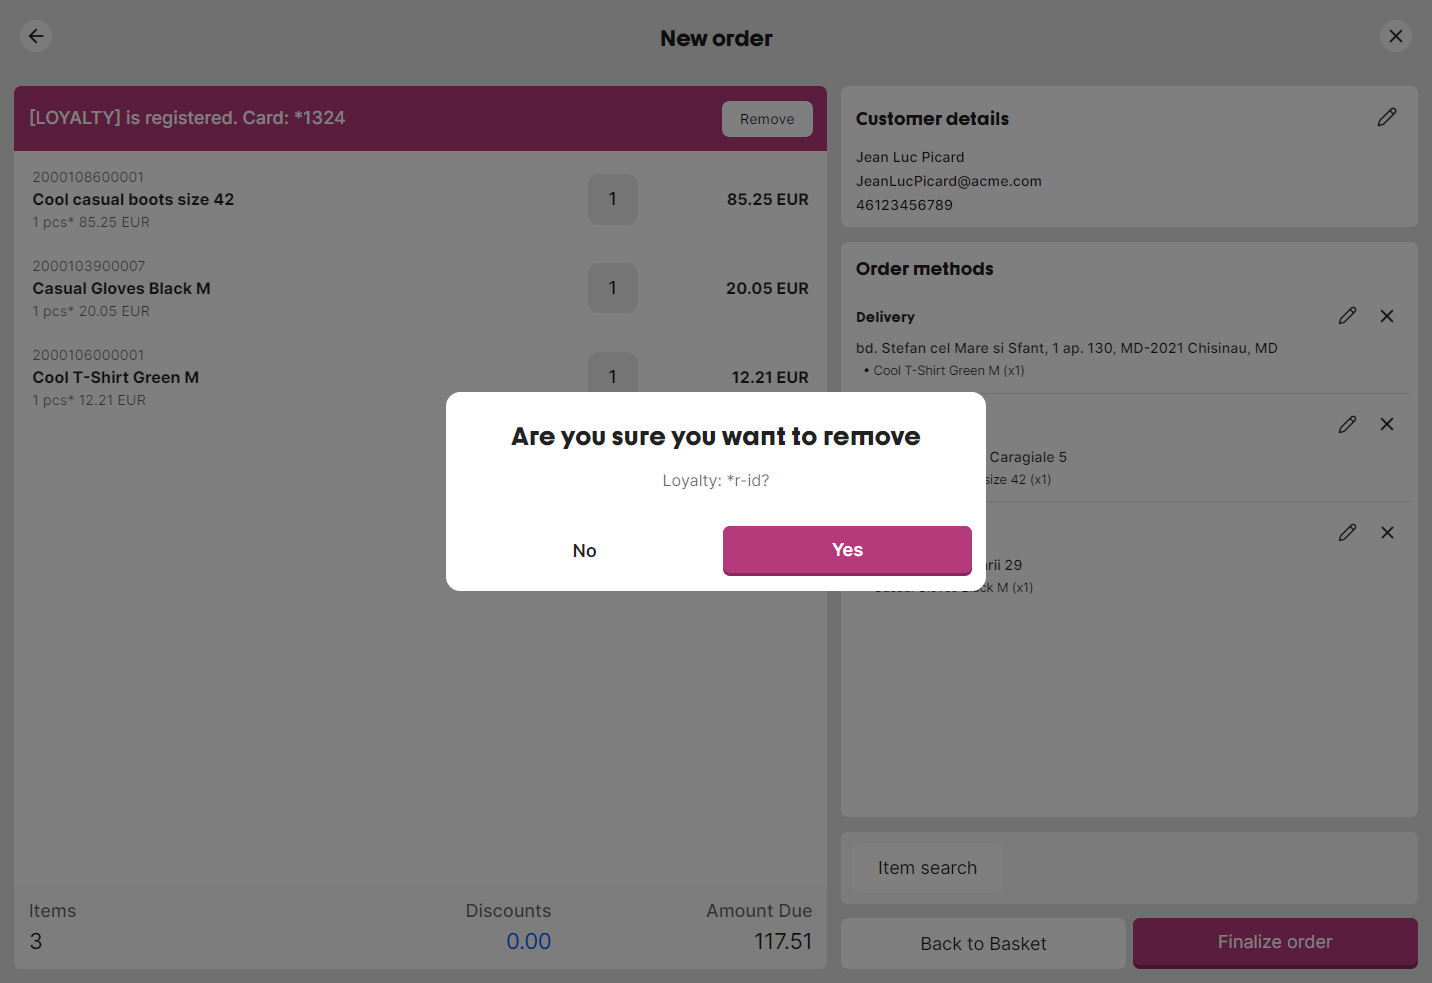
Note: Loyalty is removed from the customer order only; the main receipt loyalty remains unchanged.
Editing Customer Details
- Click the Edit icon on the Customer Details card
- Modify name, email, or phone numbers
- Click Confirm to save
Note: If loyalty data is updated externally (e.g., by scanning a new loyalty card), the form will refresh with the latest customer data.
Finalizing the Order
Completion Conditions
The Finalize Order button is enabled when:
- Customer details are entered (name and contact information)
- All items are assigned to order methods (no unassigned items)
- At least one order method is configured
Finalization Process
- Click Finalize Order
- System processes the order and creates a customer order in the backend
- Success dialog displays:
- Order ID for reference
- Partial payment amount (order total)
- Instructions for the customer
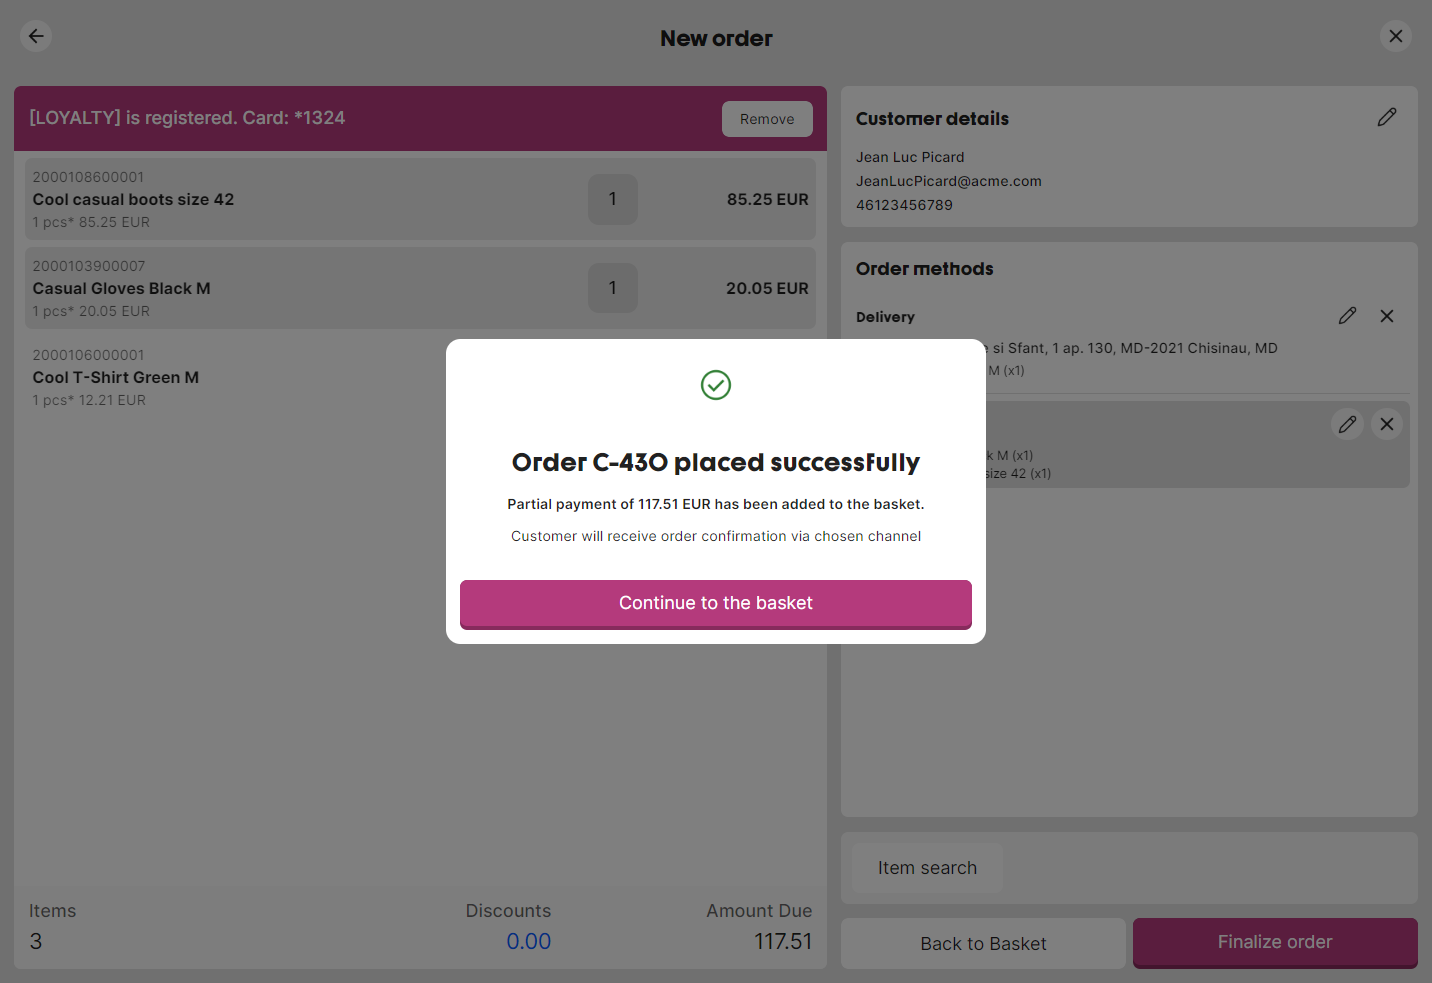
- Click Continue to the basket to return to the main application
Canceling an Order
To cancel the customer order without finalizing:
- Click the X button in the top right corner of the Customer Order view
- Confirm cancellation in the dialog
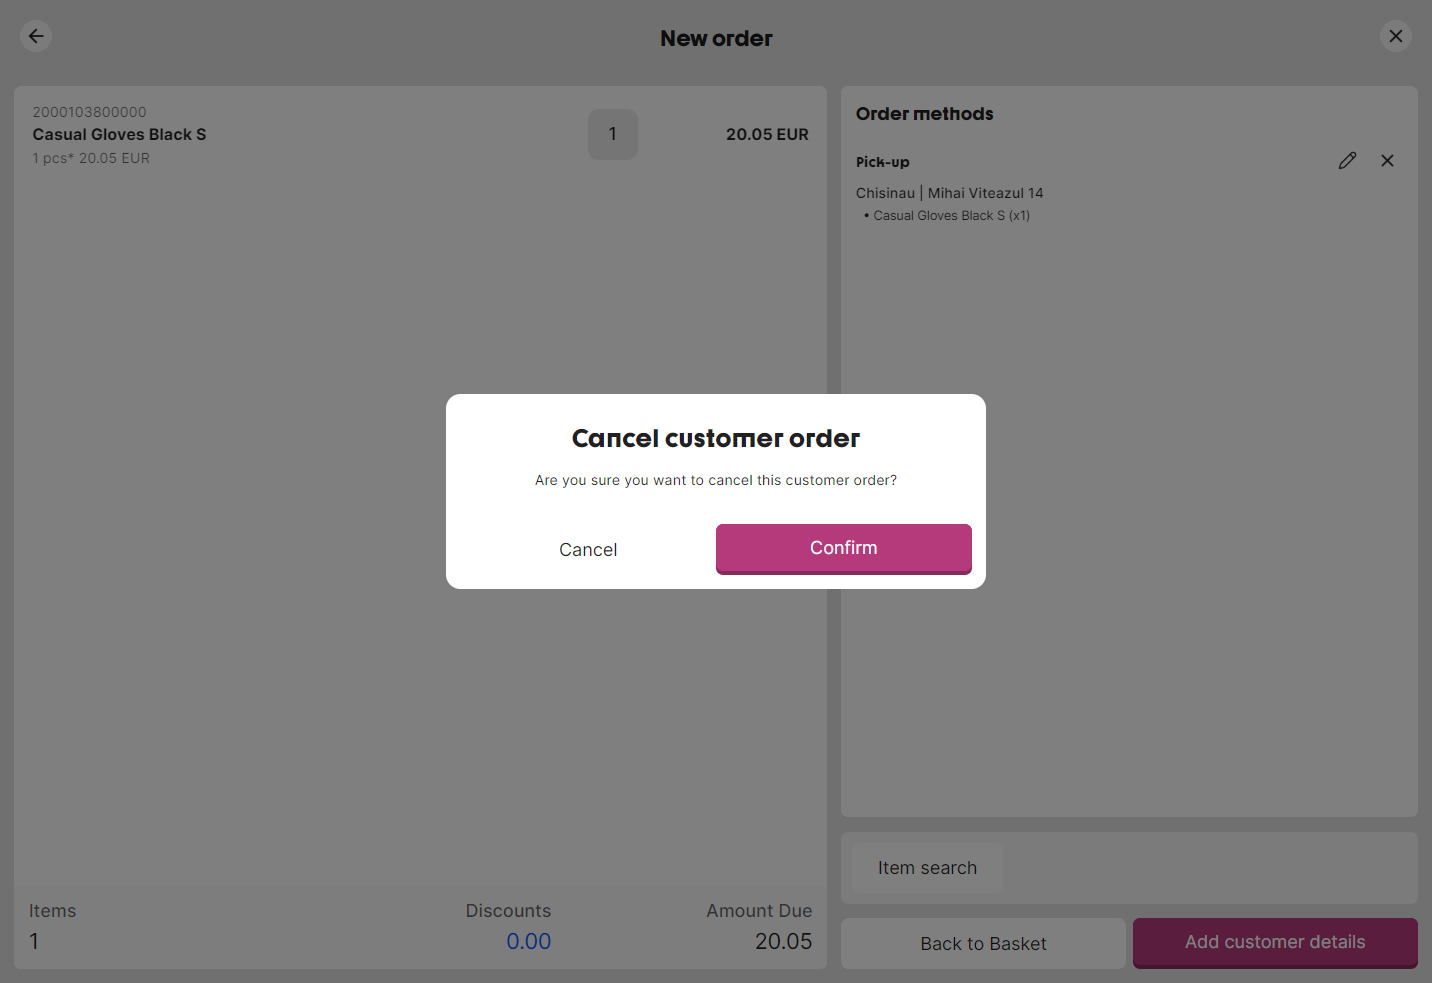
Warning: Canceling will delete the order basket and all entered data. This action cannot be undone.
Returning to Main Application
- Click Back button to minimize the Customer Order view and return to the main receipt
- The customer order remains active and can be resumed
- Click the Customer Order shortcut to resume working on the order
